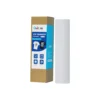
Given these films are often made up of two types of membranes, one might wonder how this is achieved without a printer. That’s exactly what I’ll be discussing today.
What Is UV DTF Type B?
Before we dive into how to use it without a printer, let’s first clarify what UV DTF Type B actually is — because, let’s face it, the name sounds more complicated than it really is.
In UV DTF (Ultraviolet Direct-To-Film) printing, there are typically two films involved:
- Film A: The printable film, where your design is first printed using UV ink and cured with UV light.
- Film B: Also known as UV DTF Type B, this is the transfer or laminating film — its job is to pick up the cured design from Film A and help apply it transfer to the final surface.
So when we say “UV DTF Type B,” we’re talking about the sticky top layer that plays a crucial role in transferring the printed image from Film A to your target object — like a mug, glass, acrylic tag, or even a laptop cover.
Typically, UV DTF printers have multiple rollers to handle the lamination of Film A and Film B. However, lamination can still be done even without a printer, although the process is a bit more involved.


If you want to know what the film is used for, see: How Do You Use UV AB Film?
How To Use UV DTF Type B Without A Printer
When your printing equipment does not have a design like Automatic Laminator, you may consider using a Laminator or Manual to complete the laminating operation.
Option 1: Use a Laminating Machine (Best Practice)
The most stable way to combine Film A and Film B is through a laminator. It’s one that has rollers that are identical at the top and bottom, and all you need to do is align the film to go through the laminator.
Steps:
- Place Film B (the sticky side) on top of the printed Film A.
- Feed the two films together into the laminator. Two films are placed between rollers and pulled in from the other end, bond overlapping films together.
- The laminator will press them flat, removing air bubbles and ensuring even contact.
- Once combined, you can cut out your design and transfer it to the final surface by peeling and sticking.
Why this works well:
- Eliminates air bubbles and wrinkles
- Ensures correct alignment
- Saves time on bulk production
This picture below is of a film laminator being sold at a mall, click here to see it.

Option 2: Manual Lamination (Doable, But Risky)
If no laminator is available, try manually pressing Film B onto Film A by hand or squeegee.
Steps:
- Carefully align Film B over the printed design.
- Starting from one edge, slowly lay it down while smoothing it with your fingers or a flat edge.
- Apply even pressure to avoid bubbles or wrinkles.
But be warned — hand lamination can lead to:
- Misalignment (offset transfer)
- Uneven adhesion, especially on small detailed designs
- Trapped dust or fingerprints
Doing this by hand is generally not recommended, it’s too time consuming. And prone to errors.

Why Professional Printers Use Laminators With UV DTF Type B
If you ever wondered why many UV DTF printers come with built-in laminators or have lamination as a standard post-printing step, here’s why:
- Precision: Accurate bonding of Film A and B is essential for clean, edge-to-edge transfers.
- Efficiency: Speeds up the process for bulk orders or multiple design sheets.
- Quality Control: Reduces human error and inconsistency in finish.
- Convenience: The laminator is integrated into the printer and runs more in line with the operating habits of the project.
Because of the issue that many UV DTF printers will come with a lamination feature, most UV DTF films just won’t come in sheets. Currently sheeted films need to be manually laminated, otherwise they are not as good for printing as regular UV printers.

Related Tips and Topics on UV DTF Type B
Choose the Right Film B Type
Type B films are primarily responsible for providing adhesion. When you are choosing this type of film, look for adhesion first and quality second. Don’t have a film that bonds well, but doesn’t peel off easily and often ruins the design.
Store Films Properly
In general, film B is pressure-sensitive and attracts dust. Store it in:
- A dust-free, dry environment
- Flat, to prevent warping
- Away from direct sunlight
If you find that the B film after lamination doesn’t provide enough adhesion, and you’ve already ruled out a super smooth substrate surface, then the film may have deteriorated.
Use Proper Tools for Transfer
Once Film A and B are combined, transferring the design onto your object is a breeze — but only if you use the right tools:
- A plastic scraper or squeegee helps apply even pressure
- Lint-free gloves prevent fingerprints
- Cutting tools help trim around complex shapes
Explore Specialty Film B Variants
Looking to elevate your designs? Some UV DTF Type B films now come with glitter, metallic, or holographic finishes. These offer a unique surface effect once transferred. It is important to note that this is just to give some simple visual effects after the transfer and is not permanent.
Conclusion
When your printer doesn’t have laminating as a feature, a laminator is your best bet. You can even make your own laminator, which really only functions to flatten two films.
If you want to manually laminate, it’s a bit of a test of your skill. This film is not usually used on its own, as long as it is intended for UV printing. It usually needs to be laminated with A-film.

