


What “Bleeding Ink After Printing” Means in DTF
In DTF, “ink bleeding after printing” describes the moment when the printer lays down more ink than the film can hold. Instead of clean dots, you see clustered droplets or puddles on the PET film—especially in high-coverage areas. It wastes ink, compromises sharp edges, and in severe cases can soften or even damage the film’s coating.
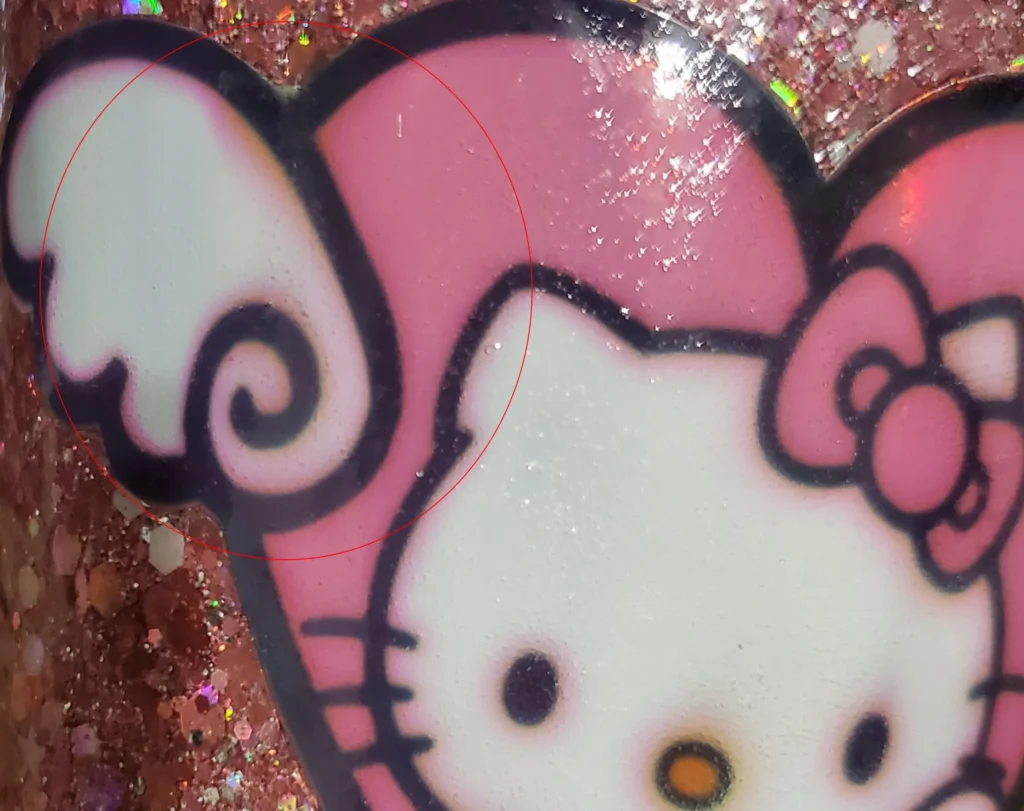
Looking closely at the picture below you will notice that the pattern on the upper left clearly has excess color showing through. And it is possible that this is a phenomenon caused by ink bleed.
It’s important to note that ink bleeding isn’t always a problem with the ink or printer. In some cases, it can be caused by the film itself. Please read: What is The DTF Film Ink Bleed Problem?
Why DTF Ink Bleeds
Bleeding ink rarely stems from a single cause. It’s usually the result of a combination of factors. While the effect of a simple setting adjustment might be easily noticeable, identifying the root cause can be difficult when multiple details are interacting.
- Excessive Ink Limits: The total percentage of CMYK inks (sometimes including white) exceeds the film’s coating absorption capacity in a single pass.
- Mismatched Profiles/Curves: ICC profiles (or printer curves) built for different inks push too much color in certain channels.
- Film Layer Capacity: Some films are designed for lower ink loads; their coatings saturate quickly.
- Excessive Output Power: Aggressive inkjet output deposits more ink than necessary.
- Print Head Height: A print head set too high can cause dots to widen, leading to ink pooling.
- Environment: High humidity, low airflow, or insufficient preheating can slow down coating drying/absorption.
- Surface Contamination: Finger oils, dust, or powder residue on the film can reduce wettability, leading to bleeding.
Bleeding is most common with white ink output because DTF printers use more white ink as an overlay. White ink is also more prone to settling, causing pigment particle precipitation.
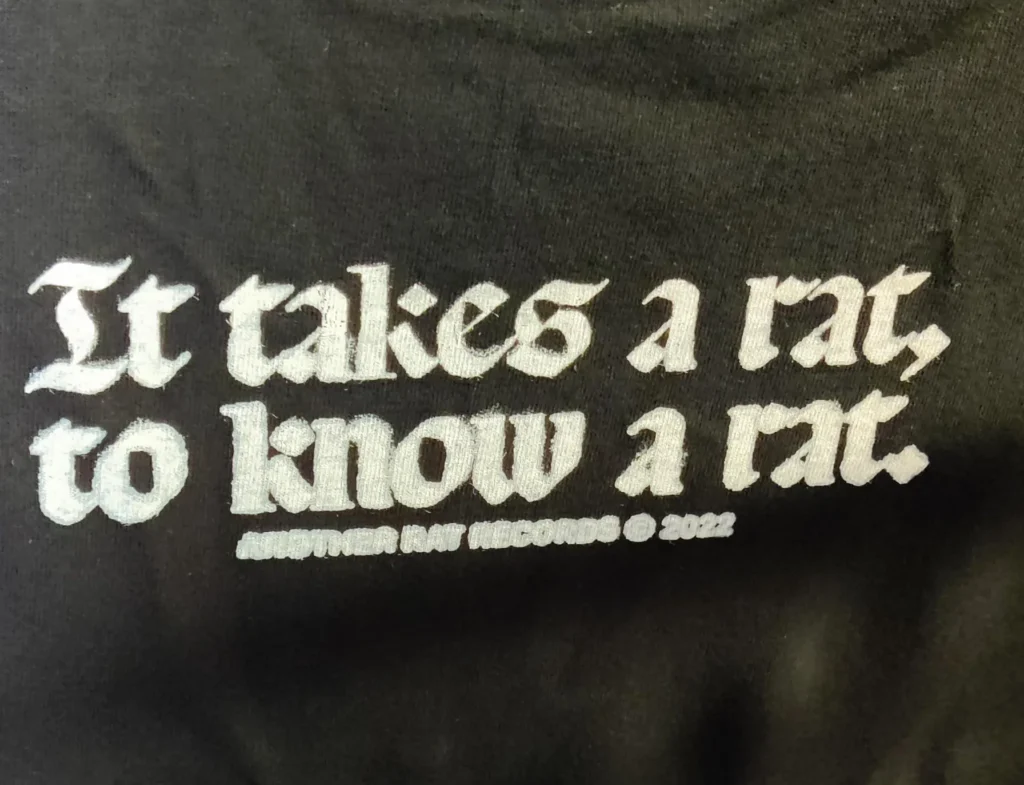
If you look closely at the image, you’ll notice that due to carelessness during the white ink bleeding, and after powder curing and heat transfer, noticeable “fuzzy edges” have appeared on the design.
DTF Ink To Bleeding Ink When Printing Practical Troubleshooting Flow
To avoid damaging the printer hardware, follow these steps to help you quickly identify the issue:
- Targeted Testing in Dark Areas: Print a small color patch with high ink coverage (C/M/Y/K gradients and composite colors). Observe whether there is any ink coalescence within the first few centimeters.
- Reduce Ink Limits in Dark Areas: In your RIP/printer software, reduce the Total Ink Limit, especially for high-density areas. Start by decreasing the darkest tones by -10% to -20% and reprint the test patch.
- Global Reduction for Comparison: If bleeding persists, apply a 20%-40% global color reduction (temporary global limit). Reprint the same color patch.
- If the bleeding improves, you have confirmed an issue with excessive ink application.
- Check Media Ink Absorption: Try a brand new sheet of the same film to rule out contamination. Then test a different film known for higher ink absorption. If the problem disappears, the media capacity is the bottleneck.
- Adjust Mechanical and Environmental Factors:
- Printhead Height: Lower it to the manufacturer’s recommended range (typically about 1-2mm above the film) to improve dot control.
- Pre-heater/Print Heater (if available): Moderate film preheating can help set the dots; avoid temperatures that soften the coating.
- Room Conditions: Strive for stable humidity and airflow; extreme conditions can slow absorption and drying.
- Retest with Your Actual Artwork: Once the color patch looks clean, reprint a small section of the actual job to confirm that the test results are applicable to real-world use.
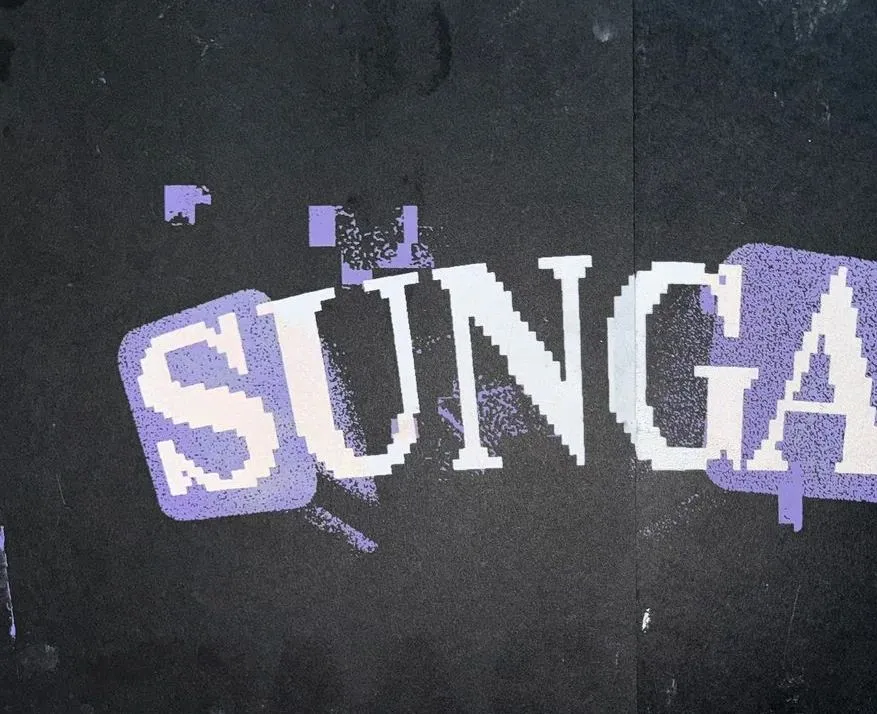
Don’t dismiss ink bleed as a trivial matter. If you spot it during a print job, address it immediately. Otherwise, you might end up with a finished product that looks like the image below, riddled with issues you’re not happy with.
Our Proven Fixes DTF Ink To Bleeding Ink
Use the Right ICC / Printer Curve
Different inks behave differently on film. If your ICC/profile (or linearization/curve) was built for another ink set or media, the RIP may over-drive one or more channels. Switching to a profile tailored to your exact ink + film + printer combination typically restores balanced ink limits, cleaner dot gain, and stable neutrals.
Choose Film with Higher Ink Capacity
DTF films vary a lot in coating quality. Upgrading to a film with a higher ink-load layer dramatically reduces puddling and preserves edge sharpness in saturated areas. If your workflow regularly requires deep coverage (rich blacks, dense brand colors), spec a film that’s rated for heavy ink loads.
Refine Output Settings (Often the Fastest Win)
Software controls are your first line of defense:
- Start with a 20%–40% all-channel reduction to immediately verify sensitivity to ink load.
- Then refine by channel or tonal zone (e.g., compress the deepest 20% of the tone curve).
- Reduce pass count/resolution if you’re overspec’d for the job. Many designs don’t need the most ink-intensive modes to look perfect. Once dialed in, systems rarely revert to bleeding unless ink, film, or environment changes.
Extra Prevention Tips
- Keep films clean: Handle by the edges; store in sleeves; avoid fingerprints.
- Maintain the printer: Regular nozzle checks; consistent agitation where recommended for your inks.
- Standardize conditions: Log your room temp/humidity, heater settings, head height, and successful ink limits with each film you use.
- Test before big runs: A 5-minute ramp print can save hours of rework.